Forget the old wives' tales about wine corks. The real secret to tender octopus isn't a myth—it's science. To get that perfect, melt-in-your-mouth texture, you need to understand what you're working with: a creature full of tough muscle fibers and collagen.
The goal is twofold: break down those fibers and convert that collagen into silky gelatin. This isn't about magic tricks; it's about technique. Most often, that means cooking it low and slow or freezing it first to give yourself a head start.
The Art and Science of Tender Octopus
Cooking octopus is a celebrated ritual, especially across the Mediterranean where it’s a cornerstone of the cuisine. The journey to a perfectly tender result has less to do with secret ingredients and everything to do with controlling the cooking environment.
If you’ve ever had rubbery octopus, it was almost certainly cooked too quickly over high heat, causing the muscles to seize up. The key is gentle, patient cooking.
This guide cuts through the folklore to give you a clear roadmap based on two core principles:
- Breaking Down Muscle Fibers: This is the prep work. In the old days, fishermen would tenderize octopus by beating it against the rocks. Today, we have a much simpler method: freezing. As the water inside the octopus freezes, the ice crystals expand and puncture the tough cell walls, doing the hard work for you.
- Converting Collagen to Gelatin: This is where the magic happens during the cook. Octopus is loaded with collagen, the connective tissue that makes it tough. When you cook it slowly at a consistent, low temperature, that collagen melts into smooth, rich gelatin. This is what creates that coveted buttery texture. You can dive deeper into these foundational cooking principles with our guide on how salt, fat, acid, and heat elevate great ingredients.
Why Technique Trumps Tradition
From a classic Mediterranean simmer to modern sous vide, every successful method shares one common element: precise temperature control.
Countries like Spain, Italy, and Portugal have perfected this over generations. It's no surprise, considering the global octopus market has surpassed 376,000 tons annually, and these regions account for more than 30% of that consumption. Their time-tested techniques, like simmering between 176–185°F (80–85°C), are engineered specifically to manage that all-important collagen conversion. If you're curious, you can learn more about these fascinating global octopus market trends.
By mastering the relationship between time and temperature, you move from hoping for a good result to guaranteeing one. The choice of fresh or frozen matters, but how you cook it matters more.
Ultimately, this guide will give you the knowledge to leave tough, chewy octopus in the past. You'll learn how to confidently replicate chef-level results, turning this impressive ingredient into a dish you can master in your own kitchen.
Choosing Your Octopus: A Chef's Secret
Your journey to perfectly tender octopus starts long before you light the stove. It begins at the market, and the choice you make—fresh versus frozen—will make all the difference. The answer isn't what most people think.
For anyone cooking at home, frozen octopus is almost always the superior choice. This isn't about cutting corners; it's a strategic move. The freezing process acts like a modern-day version of the old fisherman's trick of beating octopus against the rocks. As ice crystals form inside the muscle, they break down the tough connective tissues, doing the hard work of tenderizing for you.
What does that mean for you? Less prep time and a far more reliable, tender result. When you're buying frozen, just look for a product that's well-packaged and free from a thick layer of ice, which can be a sign it has thawed and refrozen. Opting for a quality, pre-cleaned product like sustainably sourced Portuguese octopus is a smart shortcut that gets you straight to the cooking.
Of course, sometimes you'll find beautiful fresh octopus, and you shouldn't shy away from it. You just need to know how to handle it.
Fresh vs Frozen Octopus: A Home Cook's Guide
To make the choice easier, here's a quick breakdown of what you can expect from both fresh and frozen octopus. While fresh has its place, frozen consistently delivers the tenderness most cooks are after.
AttributeFresh OctopusFrozen Octopus (Recommended)TendernessRequires significant tenderizing (beating, brining, slow cooking) to break down tough muscle fibers.Naturally tenderized by the freezing process, which breaks down cell walls. The most reliable path to a tender bite.AvailabilitySeasonally dependent and can be difficult to find, especially inland.Widely available year-round in most markets and from specialty suppliers.PreparationRequires full cleaning: beak, innards, ink sac, and eyes must be removed. This can be messy and time-consuming.Often comes pre-cleaned and ready to cook, saving considerable time and effort. A huge plus for home cooks.ConsistencyTexture can be unpredictable. Overcooking by even a few minutes can result in a rubbery dish.More forgiving and consistent. The pre-tenderizing effect gives you a bigger margin for error.
Ultimately, frozen octopus gives you a head start on tenderness and saves you a messy cleaning job, making it the clear winner for most kitchens.
Cleaning a Fresh Octopus
If you do go with fresh, the cleaning process is non-negotiable for a clean-tasting final dish. It's a bit hands-on, but totally manageable.
You’re focusing on removing three things:
- The Beak: Flip the octopus over and you'll find a hard, beak-like mouth right in the center of the tentacles. Just squeeze the area firmly from behind, and it will pop right out.
- The Guts and Ink Sac: The head, or mantle, can be turned inside out just like a sock. Once you do, you'll see all the internal organs. Gently pull them out, being extra careful with the silvery ink sac—you don't want that bursting.
- The Eyes: A small, sharp knife is all you need here. Carefully slice around each eye to remove it.
Once that's done, give the whole octopus a good rinse under cold running water to wash away any leftover grit. Now you're ready for the next step.
The Power of a Simple Brine
Whether you started with fresh or frozen octopus, this next step is a game-changer. A simple saltwater brine works wonders for both moisture and texture. Through osmosis, the salted water helps the octopus muscle cells hang onto more moisture as it cooks.
This isn't just about seasoning. A brine is your insurance policy against dry, chewy octopus. It’s a small amount of effort that pays huge dividends in the final dish, guaranteeing a more succulent texture.
Making a brine couldn't be easier. Just dissolve 50-60 grams of salt (that's about 3-4 tablespoons of kosher salt) into every liter of water. Submerge your octopus, cover it, and stick it in the fridge.
Even 1-2 hours in the brine will make a noticeable difference, but for the best results, let it soak overnight for 8-12 hours. This step seasons the octopus from the inside out and puts you on the fast track to that perfect, tender bite.
Mastering the Classic Simmering Method
Simmering is the classic path to tender octopus, a technique honed over generations in Mediterranean kitchens. This isn’t a boil-and-punish situation; it's a gentle poach that coaxes out flavor while slowly breaking down all that tough collagen.
The goal is a low, quiet simmer—never a rolling boil, which is the fastest way to make the octopus seize up and turn into rubber.
Your first move is to build an aromatic poaching liquid. Think of it as the flavor foundation for the final dish. Nothing fancy is needed, just a few key players to infuse the octopus with a subtle, savory background.
- Bay Leaves: A couple of dried bay leaves bring a deep, slightly herbal note.
- Whole Peppercorns: A small handful adds a mild warmth that doesn’t overpower.
- A Splash of Vinegar: A touch of red or white wine vinegar helps tenderize the meat and brightens everything up.
These simple additions turn plain water into a flavorful bath that complements the octopus without masking its delicate taste. Some old-school recipes even call for tossing in a halved onion or a few cloves of garlic.
The Spanish Secret to Perfect Skin
Before you settle in for the long, slow simmer, there’s a classic Spanish trick called asustar el pulpo, which literally means "scaring the octopus." It’s a simple but brilliant step that keeps the beautiful purple skin from splitting and peeling off, ensuring a stunning presentation.
Bring your aromatic water to a full, rolling boil. Holding the octopus by its head, carefully dip the tentacles into the water for 2-3 seconds, then pull it right back out. You’ll see the tentacles curl up instantly. Do this two more times, for a total of three quick dips.
This brief shock treatment helps set the proteins in the skin, making it resilient enough to handle the long cook ahead. It's one of those small details that makes a huge difference in how your final dish looks.
After the third dip, lower the entire octopus into the pot. Now, drop the heat until the water settles into a gentle simmer—you just want to see small, lazy bubbles breaking the surface.
This visual guide breaks down the essential prep work that sets you up for success.
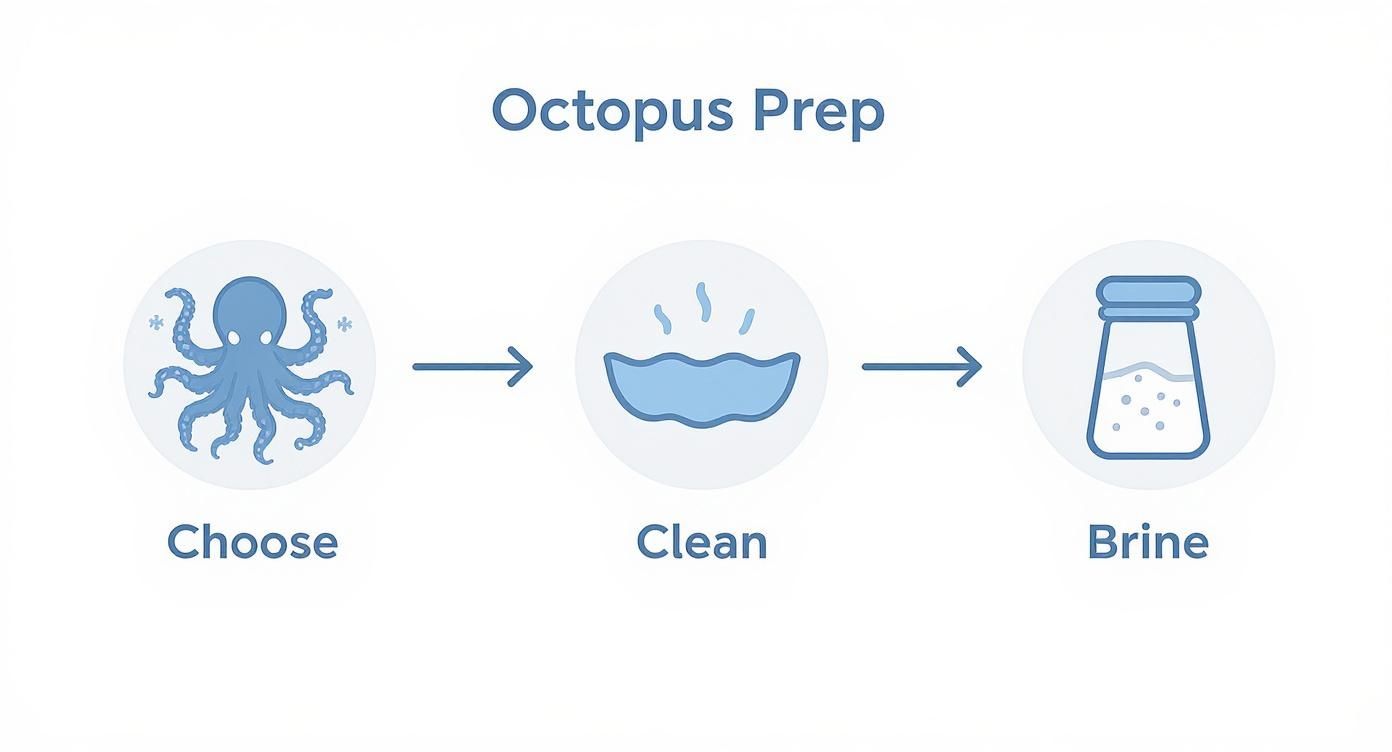
Every step here, from choosing a quality frozen product to proper cleaning, lays the groundwork for that perfectly tender result.
Timing and Testing for Doneness
The big question is always, "How long do I cook it?" A good rule of thumb is to simmer for about 20-25 minutes per pound of octopus. For methods that rely on exact temperatures, like slow-roasting in the oven, knowing your equipment is key. Spending a few minutes calibrating your oven thermometer can make the difference between good and great.
But honestly, the clock is just a guideline. The real test is texture. The most reliable way to check for doneness is with a thin wooden skewer or the tip of a sharp knife.
Gently pierce the thickest part of a tentacle, right where it meets the head. If the skewer slides in with almost no resistance—think of poking a perfectly cooked potato—it’s ready. If you feel any real pushback, it needs more time on the heat.
Once it's perfectly tender, kill the heat but leave the octopus right there in its cooking liquid. Letting it cool down in the pot is a pro move; it allows the octopus to reabsorb moisture, making it even more succulent and flavorful. Give it at least 30 minutes to rest before you pull it out for a final char on the grill or a quick sear in a hot pan.
The Modern Sous Vide Technique for Guaranteed Tenderness
For anyone chasing foolproof, restaurant-quality results at home, sous vide is a genuine game-changer. It takes all the guesswork out of cooking octopus, swapping culinary intuition for scientific precision. This is your key to unlocking guaranteed tenderness, every single time.
The magic is in the temperature control. By cooking the octopus in a vacuum-sealed bag submerged in a precisely heated water bath, you break down tough collagen into silky gelatin without ever risking overcooking. This slow, gentle process ensures the meat becomes incredibly tender from edge to edge.
It's a technique that has completely reshaped professional kitchens. A huge number of Michelin-starred seafood spots have adopted sous vide for its consistency, especially with a protein as notoriously tricky as octopus.
Setting Up Your Sous Vide Cook
Getting started is refreshingly simple. Unlike simmering, where you’re building flavor in the cooking liquid, here you season the octopus directly before sealing it. This lets the meat cook in its own juices, infusing it with flavor from the inside out.
First, pat your cleaned octopus completely dry. Season it simply with a good pinch of sea salt, some freshly cracked black pepper, and a drizzle of high-quality olive oil. You can add aromatics to the bag, but keep them minimal—you don't want to overpower the octopus's delicate flavor.
A few good options to add to the bag:
- A couple sprigs of fresh thyme or oregano
- One or two lightly smashed garlic cloves
- A strip of lemon peel (just the zest, no pith)
Once seasoned, slide the octopus into a vacuum-sealer bag and seal it up. No vacuum sealer? No problem. The water displacement method with a heavy-duty zip-top bag works just fine to push most of the air out.
The Perfect Time and Temperature
This is the most critical part: setting the right time and temperature. While there’s some wiggle room based on the size of your octopus and your texture preference, a rock-solid starting point is 171°F (77°C) for 4 to 5 hours.
This specific combo gives the gentle heat enough time to fully dissolve the tough collagen without turning the delicate meat to mush. The result is a texture that’s perfectly tender but still has a satisfying, substantial bite.
The science here is pretty cool. Octopus muscle is loaded with collagen, which needs prolonged, steady heat to soften. The global appetite for perfectly cooked octopus reflects this blend of old-school tradition and new-school tech, with the market projected to grow to over 420,000 tons annually in the next decade. You can get a better sense of how innovation is driving this trend by reading the future outlook for the octopus market.
Finishing for Maximum Flavor and Texture
After hours in the water bath, your octopus will be incredibly tender, but it won't look like much. The final step is absolutely essential: giving it a hard sear to create color, char, and an irresistible textural contrast. This is where you turn a perfectly cooked ingredient into a spectacular dish.
Take the octopus out of the bag and pat it extremely dry with paper towels. Any moisture on the surface will just create steam, and that's the enemy of a good sear.
You have two excellent ways to finish it:
- On the Grill: Get your grill screaming hot. Lightly oil the tentacles and grill for just 1-2 minutes per side—long enough to get beautiful char marks and slightly crispy edges.
- In a Pan: Heat a cast-iron or other heavy-bottomed skillet over high heat with a slick of oil. Once it's almost smoking, sear the octopus for about 60-90 seconds per side.
Don't skip this last step. It marries the modern precision of sous vide with the timeless appeal of fire-kissed flavor. You get the best of both worlds: guaranteed tenderness inside and a delicious, smoky char on the outside.
Finishing and Serving Your Masterpiece
You’ve patiently guided your octopus to a state of perfect tenderness. Now comes the finale—the step that introduces texture, color, and a final layer of char that turns a great ingredient into an unforgettable dish.
The goal here is a stunning contrast: a soft, yielding interior against a deliciously crisp, lightly charred exterior. Whether you're working with a grill or a pan, the method is the same: high heat and fast cooking.
The Perfect Sear
Your octopus is already cooked through, so this last move is all about the finish. First, pat the tentacles completely dry with paper towels. Any moisture left on the surface will just create steam, and steam is the enemy of a good sear.
Toss the octopus lightly with a bit of high-quality olive oil, salt, and freshly cracked black pepper. Then, it's time to choose your tool.
- On the Grill: Get your grates ripping hot. Lay the tentacles directly over the heat and cook for just 2-3 minutes per side. You’re looking for distinct char marks and crispy, blistered edges.
- In a Pan: A cast-iron skillet is your best friend here. Get it over high heat until it's almost smoking, then lay the octopus in a single layer. Sear for 60-90 seconds per side until it’s beautifully browned.
This quick blast of intense heat brings a smoky depth that plays perfectly against the octopus’s natural sweetness.
The goal isn’t to cook it further, but to kiss it with fire. This last-minute sear is what separates a good octopus dish from a great one, adding a textural dimension that makes each bite more interesting.
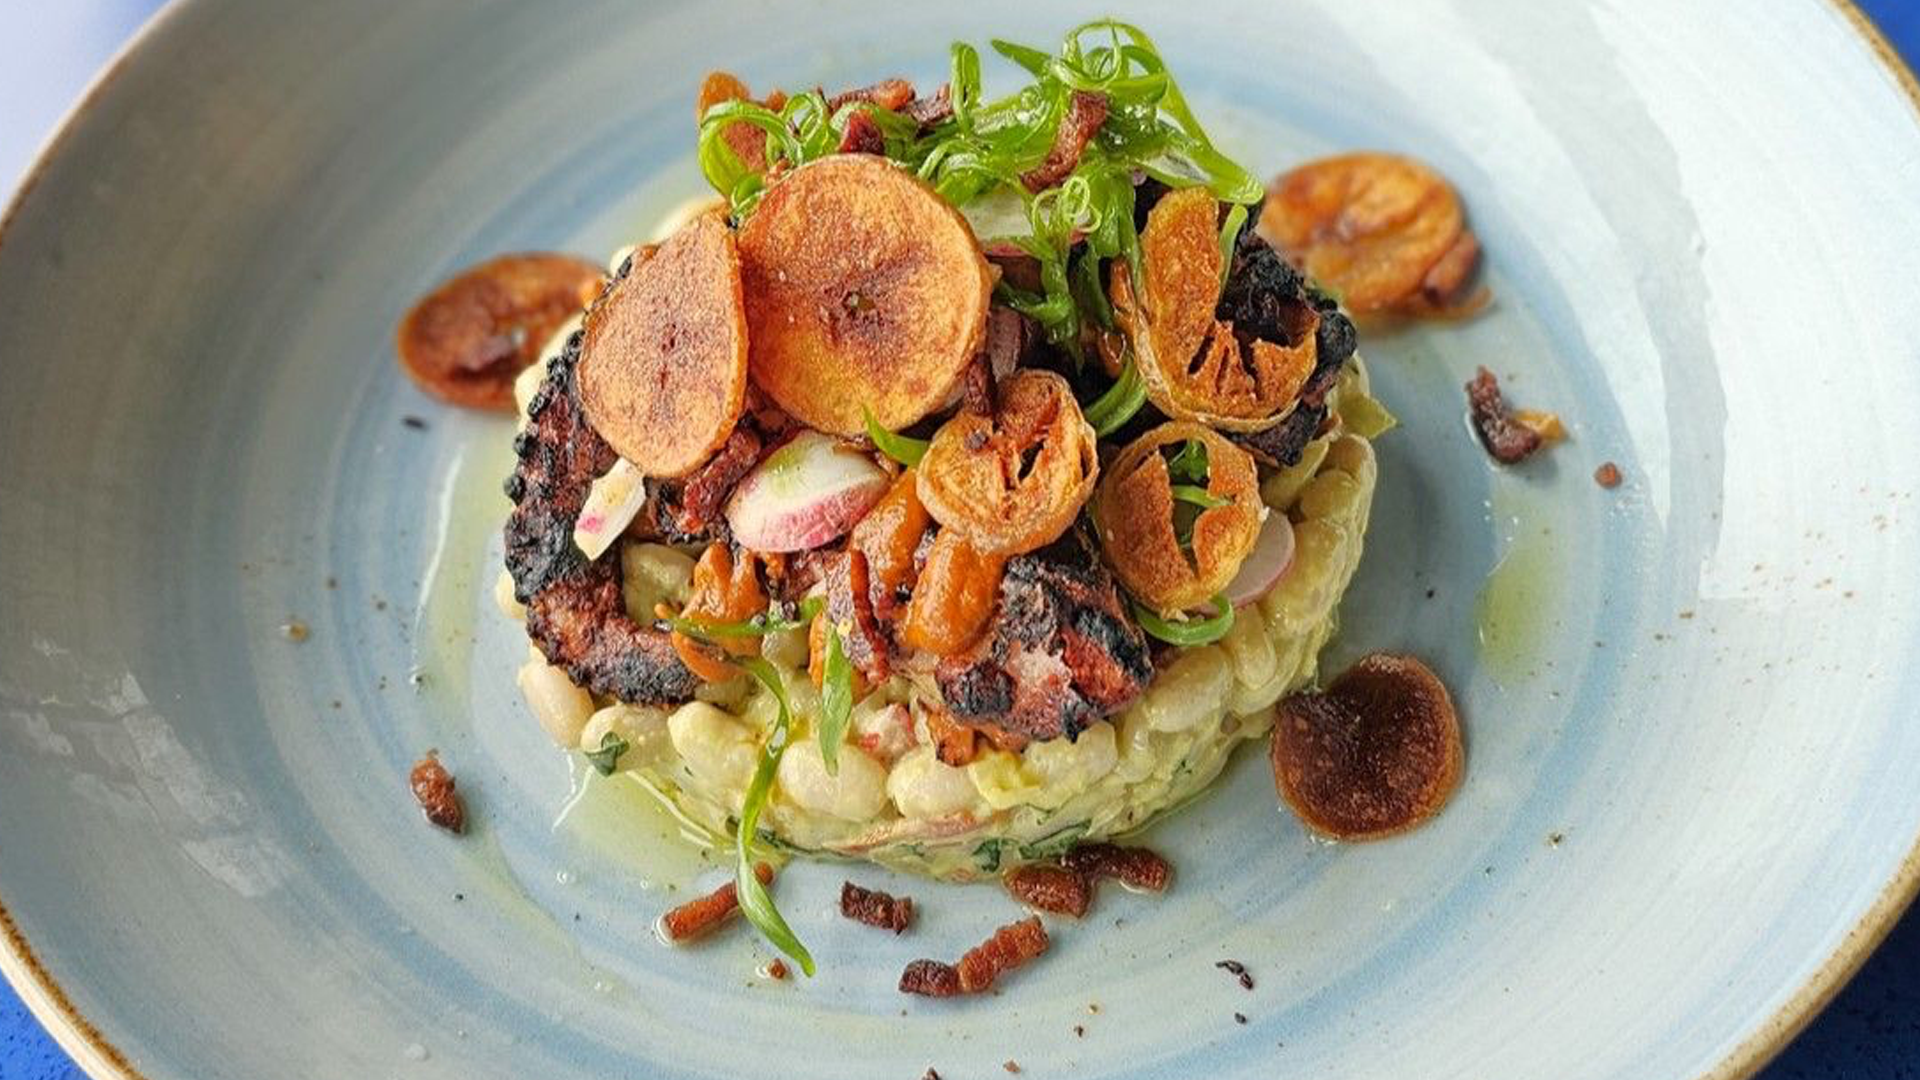
Classic Serving and Pairing Ideas
With its incredible texture as the star, the octopus doesn’t need much help on the plate. A simple, Mediterranean-inspired approach is often the most effective.
Think about a drizzle of your best extra virgin olive oil, a generous squeeze of fresh lemon, and a sprinkle of smoked paprika. This classic combination highlights the meat’s natural sweetness without overpowering it. For a more complete dish, our recipe for Pulpo a la Plancha with Aji Ahumando Sauce offers a vibrant and flavorful take.
When it comes to pairings, let the octopus shine. Creamy potato purée, crispy roasted potatoes, or a simple white bean salad all provide a wonderful textural contrast. If you're serving a larger crowd, keeping your perfectly seared octopus at the right temperature is key; you could explore options like using a chafing dish to keep food warm for a buffet-style setup.
Questions From the Kitchen
Even after you’ve nailed the basics, a few classic questions always come up when working with octopus. These are the little details, the bits of kitchen wisdom, that separate a good dish from a truly memorable one. Let’s clear up some of the myths and troubleshoot the common hurdles.
Debunking the Wine Cork Myth
First, let's talk about the wine cork. It's one of the most persistent tales in seafood cookery: toss a cork into the pot to guarantee tender octopus. It’s a charming piece of folklore, but that's all it is. There’s zero science behind it.
Tenderness comes from one thing: the slow, gentle breakdown of collagen. Your energy is much better spent managing your heat, not fishing a cork out of the cooking water.
Troubleshooting in Real Time
So, what went wrong? You followed the recipe, but the octopus still came out rubbery. Nine times out of ten, it’s an issue of heat and time. A hard, rolling boil is your enemy here—it causes the octopus’s muscles to seize up instantly, resulting in that tough, chewy texture.
The sweet spot is a low, lazy simmer, somewhere around 185-195°F (85-90°C). This gentle heat gives the connective tissue all the time it needs to melt into rich, silky gelatin.
What about when the beautiful purple skin starts peeling off mid-cook? That’s almost always a result of temperature shock.
Pro Tip: There’s a classic Spanish trick for this called asustar el pulpo, or "scaring the octopus." Before simmering, dip the octopus into the boiling water for a few seconds, lift it out, and repeat this three times. This quick shock helps set the skin, making it far less likely to peel away later.
It’s a simple, brilliant step that makes a huge difference in the final presentation.
Can You Prep Octopus Ahead?
Absolutely. In fact, octopus is one of the best proteins you can possibly make ahead, which is a lifesaver for service or even just a dinner party.
Here’s the right way to do it:
- Cook It Through: Simmer, sous-vide, or pressure cook the octopus until it’s perfectly tender.
- Cool It Down Right: This is the most important part. Let it cool completely in its own cooking liquid. This allows the octopus to reabsorb moisture and deepens its flavor. Don't skip this.
- Store It Smart: Once cool, move the octopus and a bit of its liquid to an airtight container. It’ll hold beautifully in the fridge for up to two days.
When you're ready to serve, just pat the tentacles dry and finish them with high heat—a quick char on the grill or a hard sear in a cast-iron pan is perfect. It’s a completely stress-free way to get that perfect texture and flavor every time.
At WorldClass, we provide chefs with exceptional ingredients that tell a story of origin and quality. Discover our sustainably sourced Portuguese Octopus and other premium provisions by visiting https://www.worldclass.com today.
Article created using Outrank